Installing Our Mosaic Murals
|
Jump to: Before you start Our mosaic kit Preparing the mosaic sheets for installation Gluing mosaics up to 1.5 square meter Gluing mosaics above 1.5 square meter Developing our mosaics we had to face the challenge of creating a mosaic mural that is simple to install. We looked for ways to ensure that even if the installation is not carried out by an experienced professional the end result would still be a pleasure to look at. Developing our installation method we had spent huge amounts of time and money (and otherwise perfectly good mosaics) that had to be thrown away after failed assembly. But, at the end of the day we have managed to develop a system that makes our mosaic accessible to hobbyists, DIY enthusiasts and, yes, even professionals. The process below describes a 100% successful way to install our mosaic murals. Please follow it carefully and your satisfaction with the end results will be guaranteed! Before you start We recommend gluing our mosaics to a rigid plastic carrier (Perspex or PVC boards will do fine). Such boards are available in professional supply stores and can be bought cut to the right measure. This method has some major advantages over the direct to wall bonding method: 1. Our tiles are much thinner than regular tiles. The carrier board adds 3 mm (0.12”). 2. This system allows the usage of standard, inexpensive epoxy glue that holds the tiles much better than any commercial mosaic glue. 3. As the plastic carrier is water resistant grouting is not a must. 4. It is much easier to work with a horizontally laid board than a vertical wall. Press here if you need a big mosaic or can not find a suitable board. Our mosaic kit Our mosaics are glued “face on” on a transparent film sheet. We use the transparent mosaic film as this solution presents several important advantages:
Preparing the mosaic sheets for installation Take the mosaic sheets out of the box and place them on the floor or on a big, clean work bench with the plastic film side up. If needed remove the secondary film (attached to the tiles “bumpy” side). We use this film to make our mosaic more robust for shipping and it has no functionality in the mosaic assembly process. The below illustrates the way the mosaic sheets should be placed: 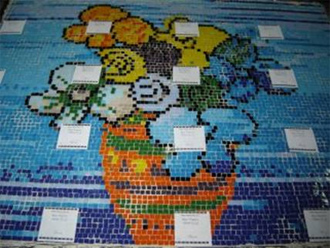 The sheets should be placed as close as possible to each other as in the following images: 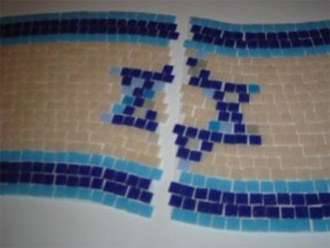 Before assembly 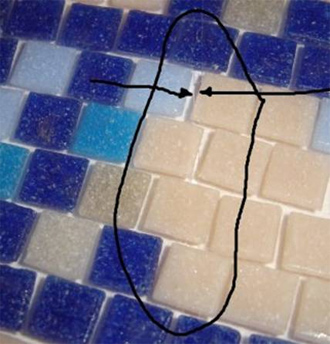 After assembly |
The sheets should combine in such a way that that the film edges are almost touching each other and the tiles “flow” naturally from one sheet to the other.
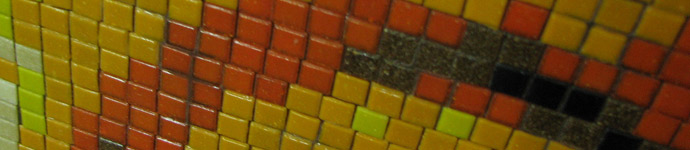
As we do not assemble our tiles in a matrix like fashion (i.e. our tiles are not set in straight rows and columns, unless we are asked for) the mosaic sheets edges are not smooth. This feature of our technology helps eliminating visible stitch marks between sheets. As shown above, our mosaic sheets are impossible to distinguish once the mosaic is assembled.
After you place all of the mosaic sheets in their right location and once you are satisfied that there are no visible “stitch marks” between the sheets, use the supplied transparent glue strips to bond the sheets to each other. Use one stripe for each stitch and make sure that every sheet is glued to all of the adjusting sheets.
The bonding of the resulted mosaic sheet to the carrier board is described in item 3 below. Please note that for mosaics bigger than 1.5 square meters it is recommended to glue each sheet at a time to the wall or carrier board. If you decide to glue the sheets one at a time to the board (see below for glue dispensing instructions), after the sheets are glued to the board use the supplied glue stripes to fasten each sheet to the neighboring sheets so there will not be any stitch marks created by film movement. Gluing the mosaic to the carrier board - mosaics up to about 1.5 square meter If transparent Perspex is used, it is best to place the carrier over the mosaic as it makes the accurate spread of the glue lines easier. If you use an opaque substrate use 8 mm (1/3”) spacing between the glue lines. Make sure that initially the glue line is about 1 mm in diameter when it leaves the nozzle. 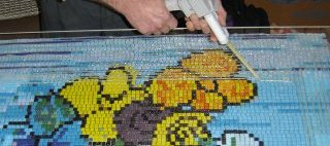 As in this method we do not cover 100%of the surface it is very important not to leave “dead” spots (see below how we handle dead spots). After the glue is applied in full, carefully lift the big mosaic sheet you created by connecting the sheets and place the mosaic on the glue covered surface (Needless to say, the bare side of the tiles needs to contact the glue). Gluing the mosaic to the carrier board - mosaics above 1.5 square meter For mosaics bigger than 1.5 square meters glue one sheet at a time. We recommend to start at the bottom left (0,0) corner. After placing each sheet it is recommended to fasten it to the neighboring sheets with the supplied transparent glue stripes. While this is not a must it’s a highly recommended procedure as it ensures that the sheets will stay in the accurate relative positioning till the glue bonds. 4. Removing the transparent film Before attempting to remove the transparent sheets make sure that the glue has bond completely. We recommend waiting at least 24 hours. As it is very hard to avoid dead spots altogether, it is probable that few tiles would lift up with the transparent sheets. In such case use the following procedure: First cut a small diameter of film around the tile so you have a small “patch”. Inject a small amount of glue on the empty tile “spot” and use the patch to secure the tile in place. After the glue bonds remove the patch. 5. Grouting Grouting should be left to after the mosaic board is connected to the wall. Please note that if you use the method described above grouting is not a must. The grout does not add bonding strength and the plastic carrier board blocks any moister coming from the mosaic. If you do decide to grout any standard mosaic grout will do. In most cases the grout color should be a light shade of gray or brown in order not to disturb the mosaic appearance. Using plastic globs apply the grout to the mosaic, making sure that all the spaces between the tiles are filled completely. Remove the excess grout with a wet sponge. After 24 hours you can scrap the surface with a wet cloth to get the tiles natural shine back. 6. Direct to wall bonding For direct to wall bonding and additional grouting information, useful information can be found in using the following links: http://www.ctioa.org/reports/fr93.html http://www.ctioa.org/reports/fr37.html If a carrier board can not be used we recommend using acrylic or cement based mosaic glue for our mosaics. |
Product Specifications | Installation | Sitemap
 Designed by Koomkoom Multimedia |
  Secure online reseller | © Copyright Mosaic4u 2008